Last week we had a wonderful opportunity to provide work experience to a student from one of the local colleges. Despite her young age Rachael demonstrated good knowledge of Adobe Photoshop and Illustrator, great imagination, creativity and made the whole week extra pleasurable and fun. Rachael was working on stripy fabric prints designs and was very happy to share her fabric designing process with us. We are sure this will help many people to understand how fabric design process works and steps required.
Brief
I was given a design brief to come up with 3 different stripe design prints relating to the current trends for women’s wear in summer. I needed to explore stripe designs and its versatility, playing with negative and positive spaces, sizes, mix & match and texture. The design was also going to be inspired by crystal rock colours.
Mood Research
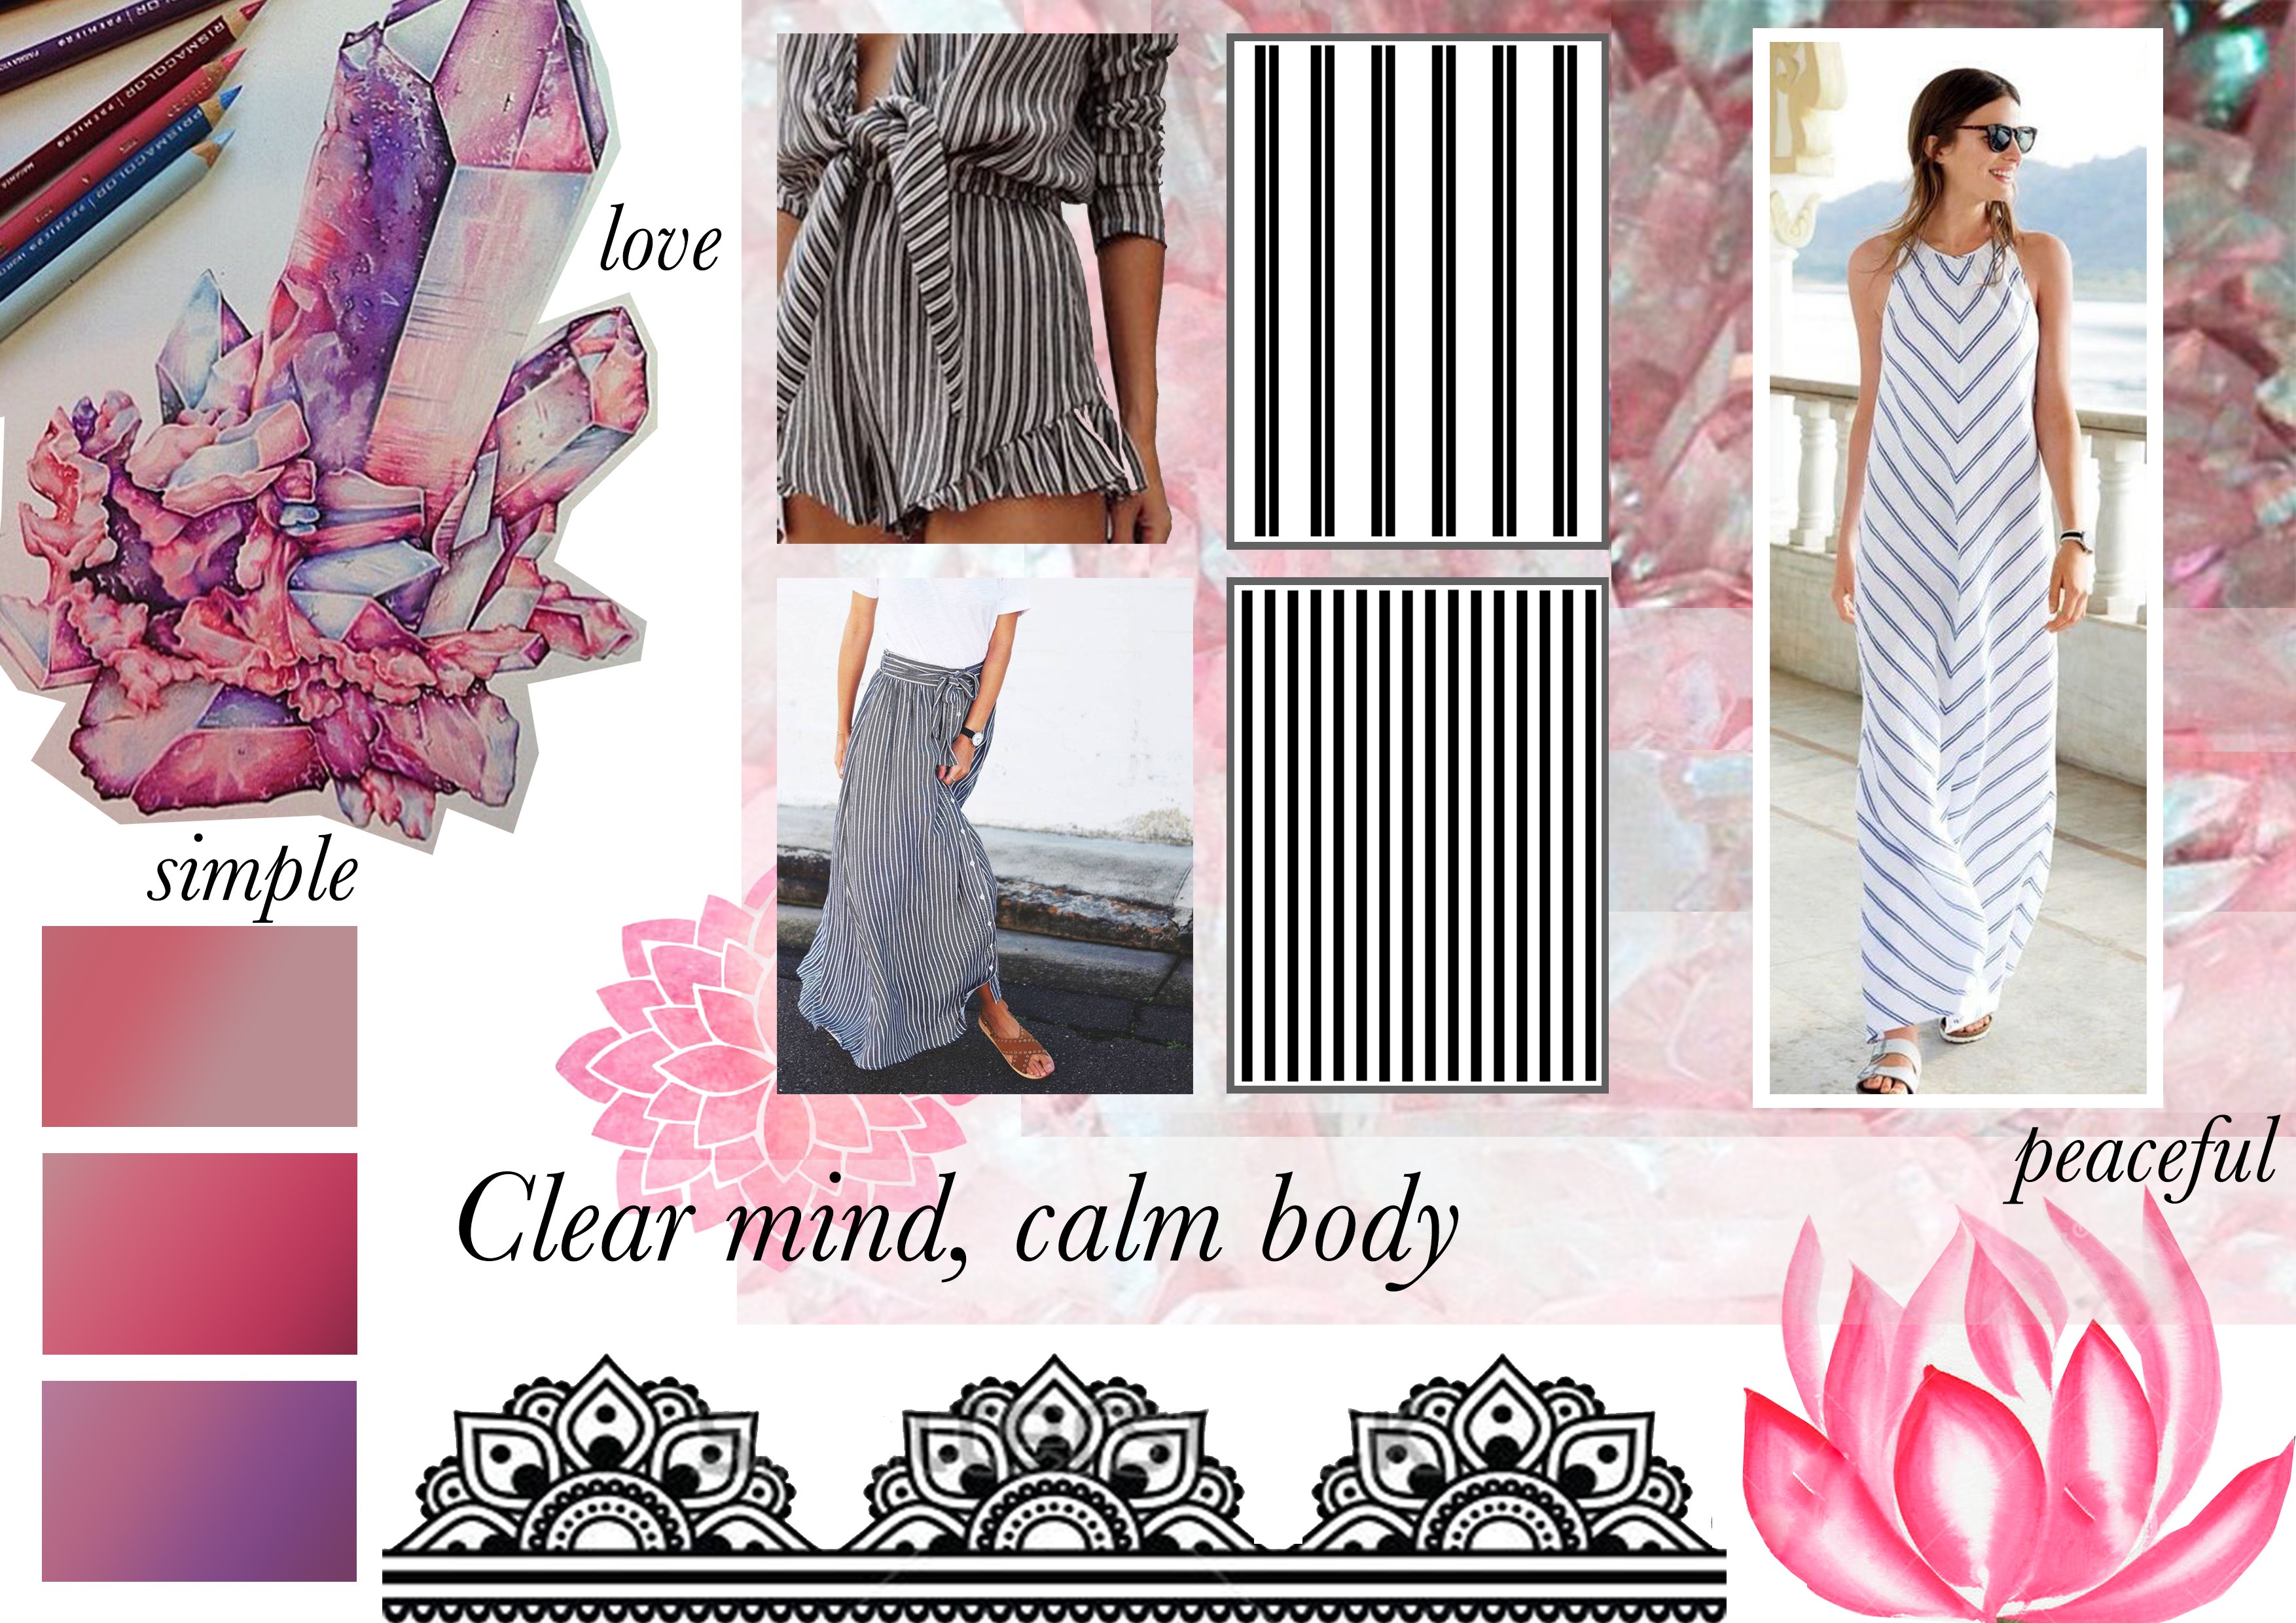
To support the ideas I made two mood boards both displaying two different moods and stories. I used Pintrest as a starting point for developing ideas. I found different summer stripy trends and categorised the images into: bold, thick stripes- conveying a heavier look; and thin, light stripes- conveying a more peaceful look.
Colour research
I also found images of crystals and looked at the many different colours. I really liked the lighter blues and pinks. I found darker crystals that had a different mood to them. The darker colours consisted of dark purples and blues. Once I had found my two different moods I linked the two ideas together: the crystal colours with the stripy designs.
Moodboarding
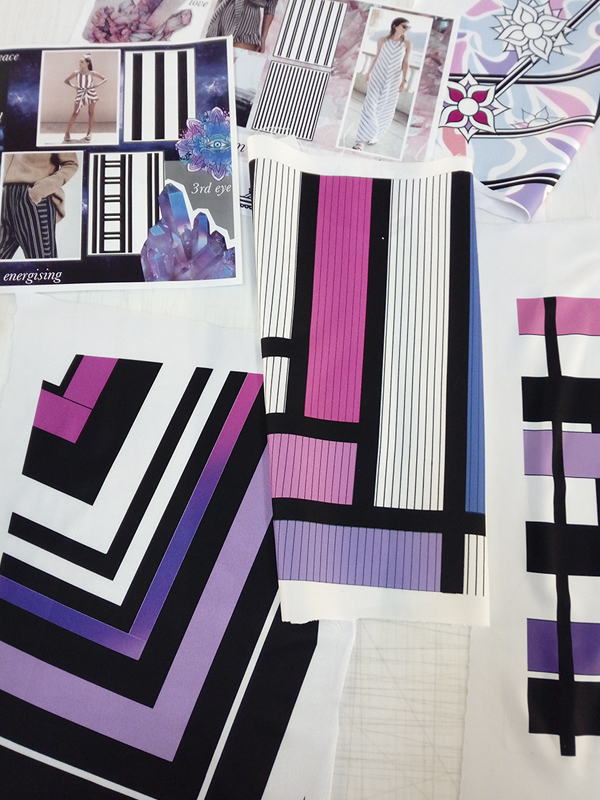
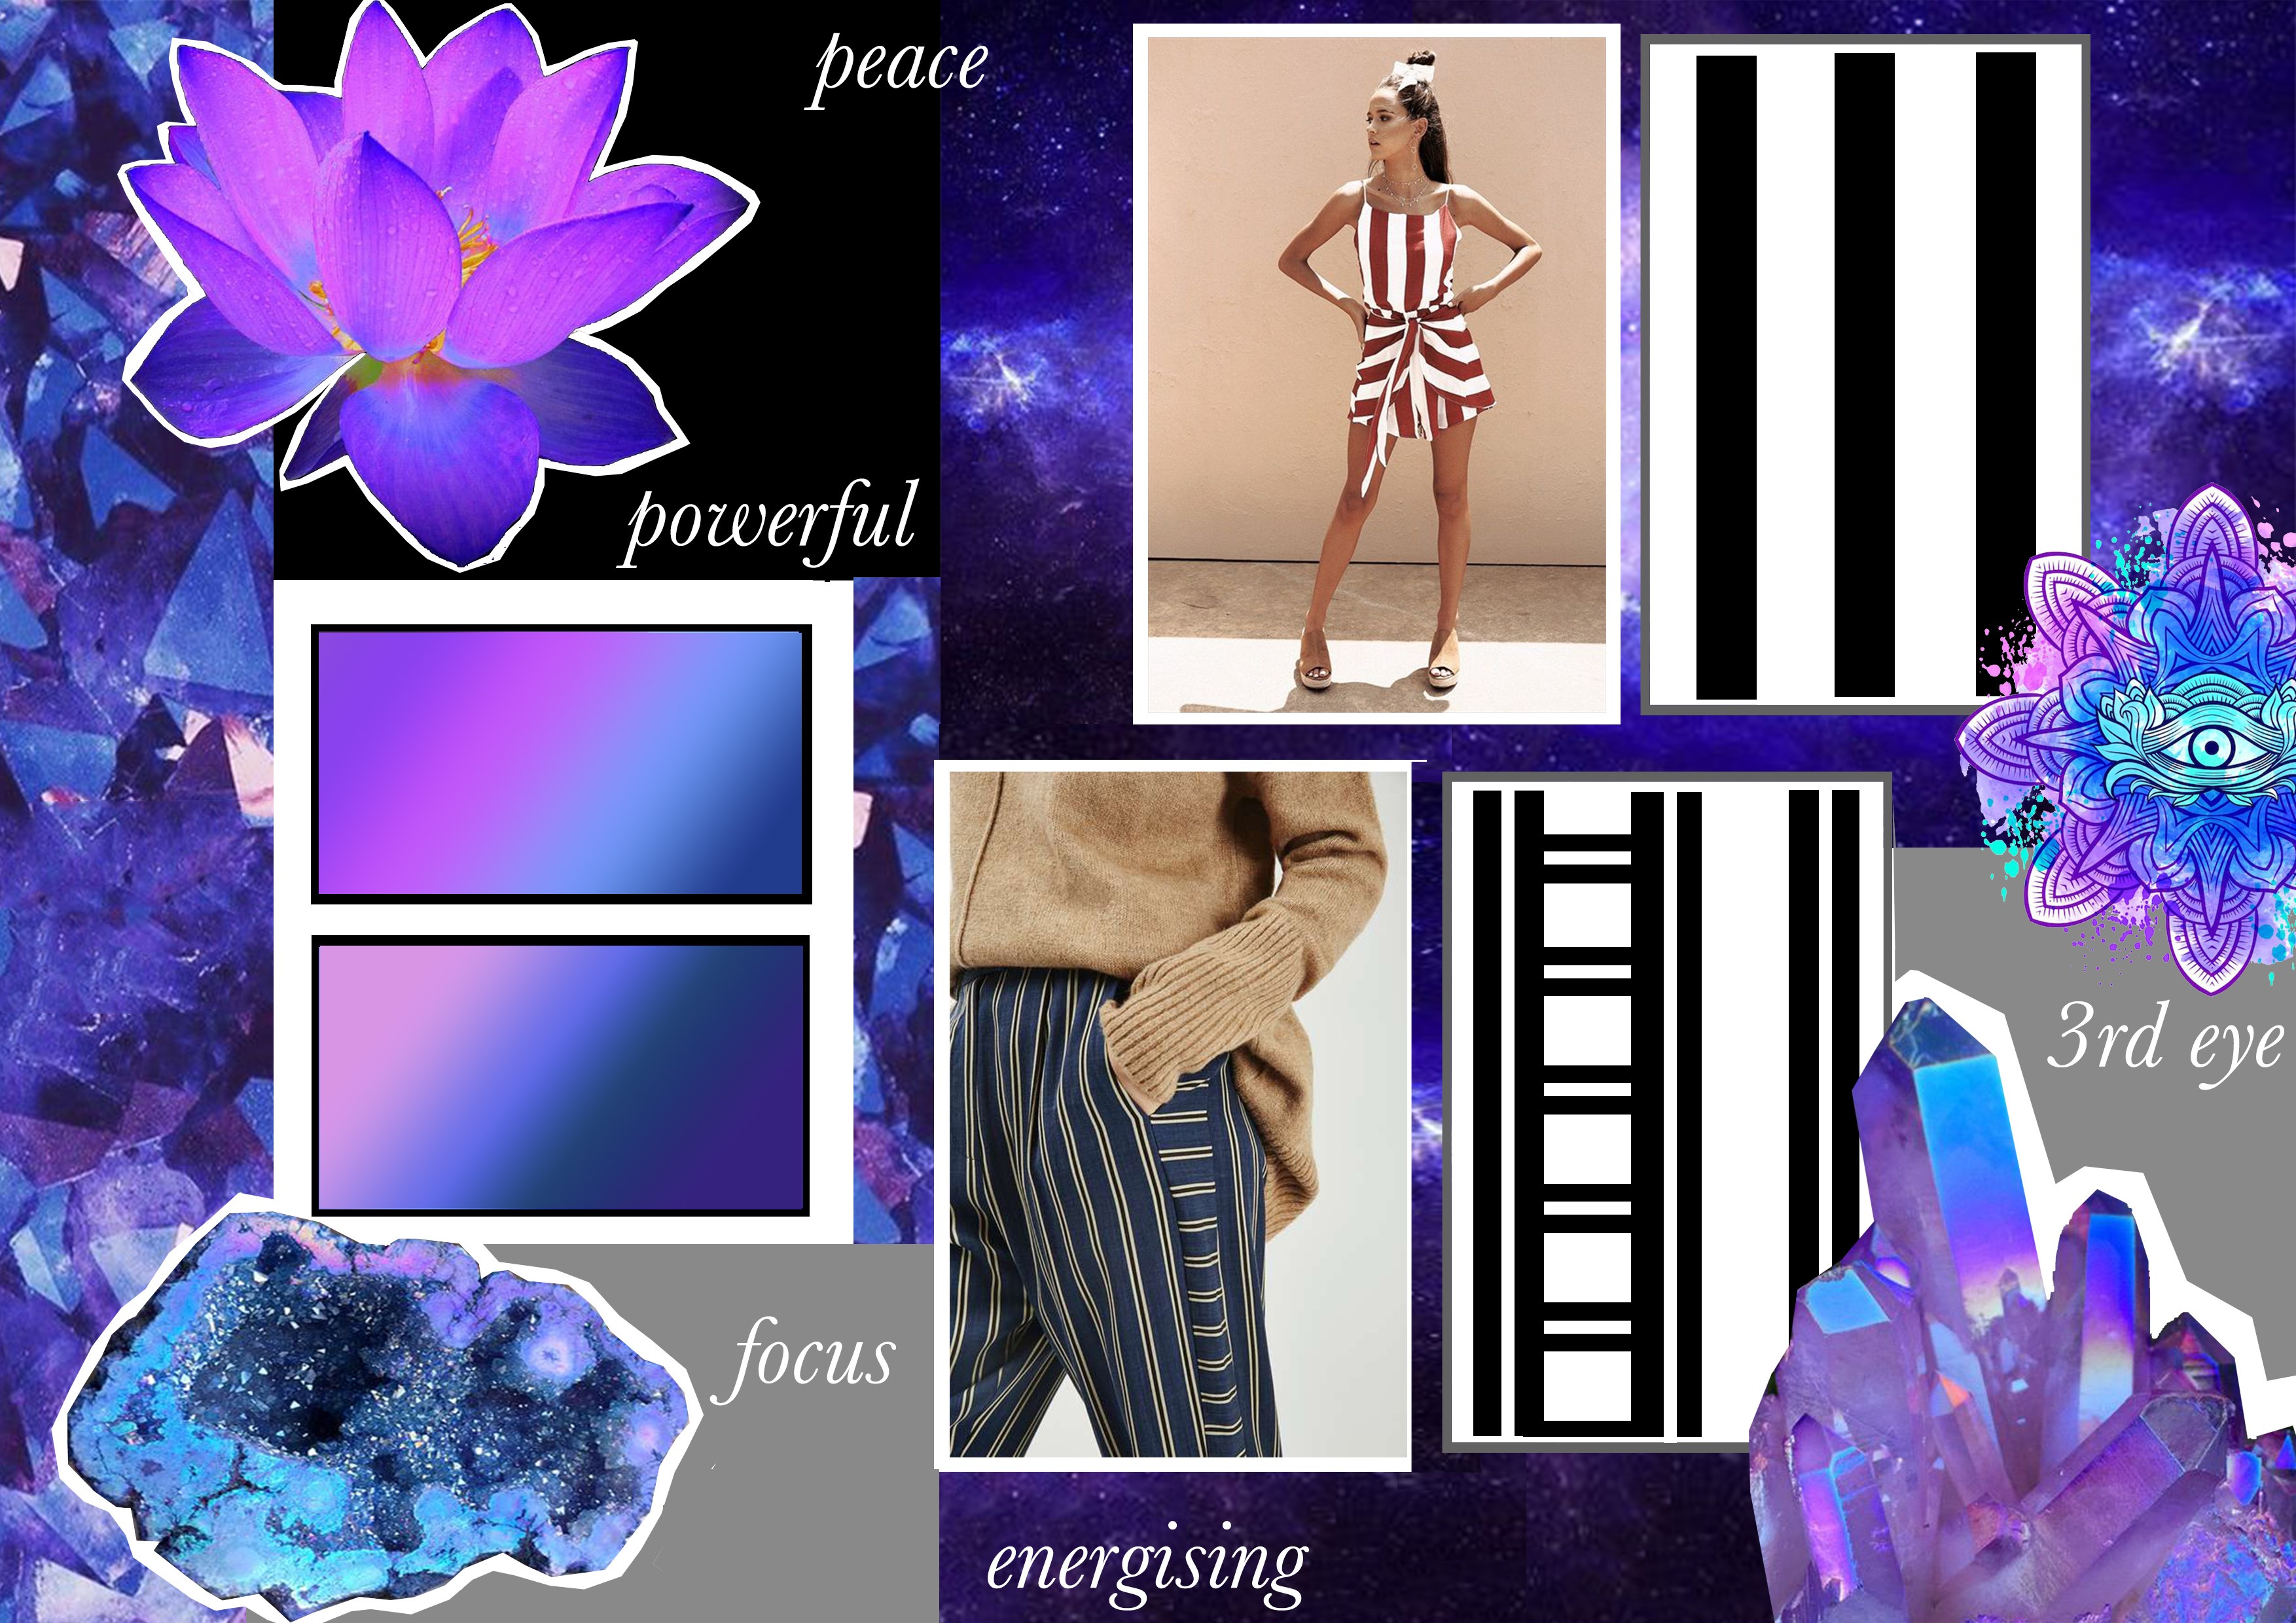
I made two different mood boards displaying two different unique styles on Photoshop, The bold stripes and dark colours & simple and relaxing.
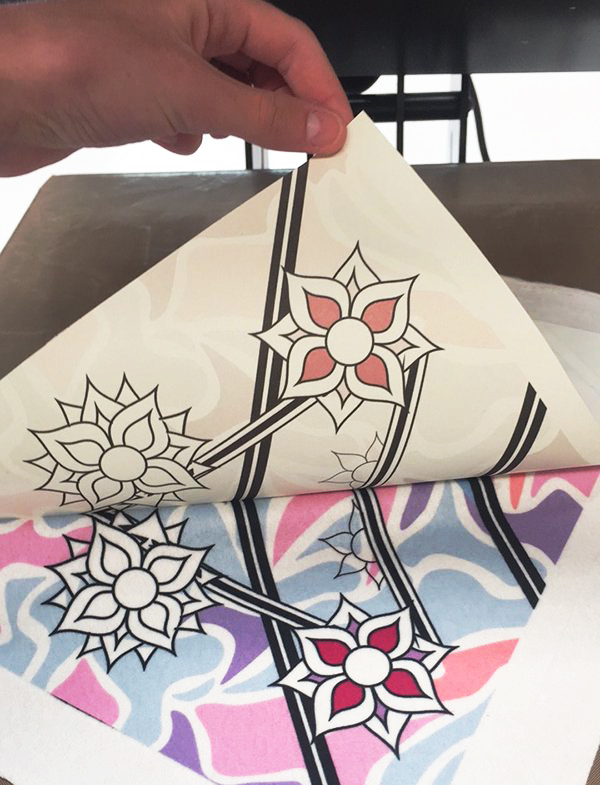
My first mood board conveyed a peaceful, simple and relaxing mood with small thin stripes, using light and dark pinks. I thought that the light pink colours would work well with detail in the stripes. I went with the whole crystal, spiritual idea and I was really influenced by henna. Henna is traditionally used in Indian weddings, but today henna can be found at most local markets. I thought about combining the two ideas: busy stripes and floral henna style flowers.
My other mood board was going to contain more of a bold strong stripe designs with darker purple colours.
Defining colours
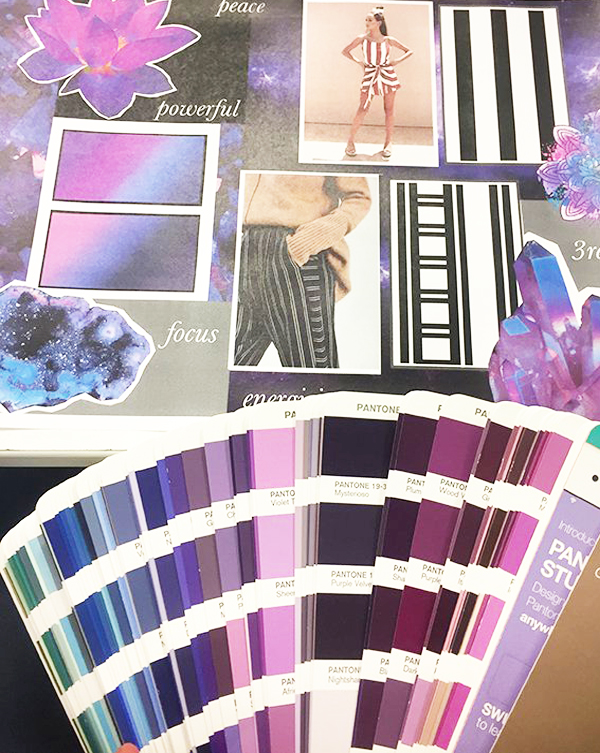
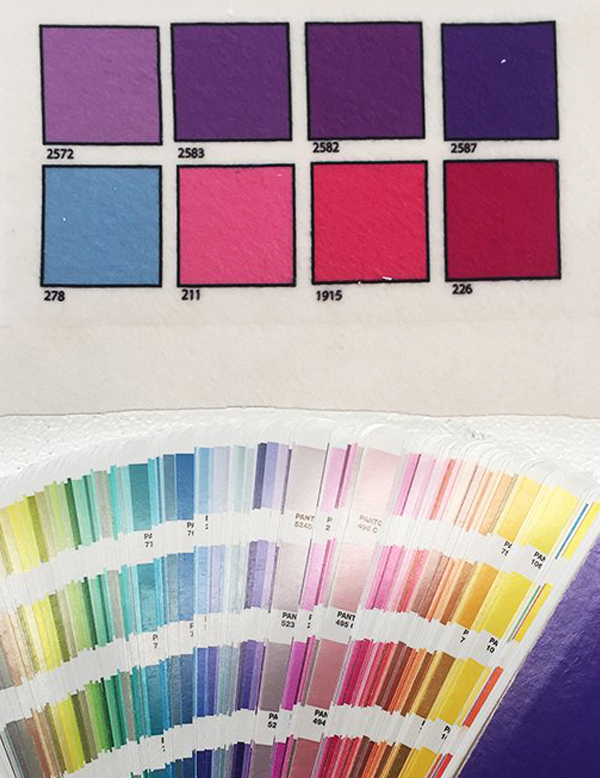
Once I had made my two mood boards I wanted the colours on my Photoshop document to match the final design on fabric. For this I had to go through a Pantone formula guide colour book to find colours that I liked and when I found a colour that matched I would write down the number. In Illustrator I made boxes with the exact colours, with their number. I printed them out and checked to see if they were the correct colours. Depending on the fabric, the colours print slightly differently.
Design experimentation and development
Simple and relaxing
I wanted to make a design that incorporated stripes with a henna style floral. I wanted to have a detailed design with not too over-the-top with colours. I started to draw up some ideas on paper. I really liked having colourful flowers with black and white stripes crossing under them. I made an Illustrator document with the idea. After some fiddling and small changes to my design I thought the background being one colour would be really boring. I wanted to make a colourful, but not too bright background. I thought about something like an army camouflage pattern, just to make it a colourful but not overpowering the stripes and flowers.
The bold stripes and dark colours
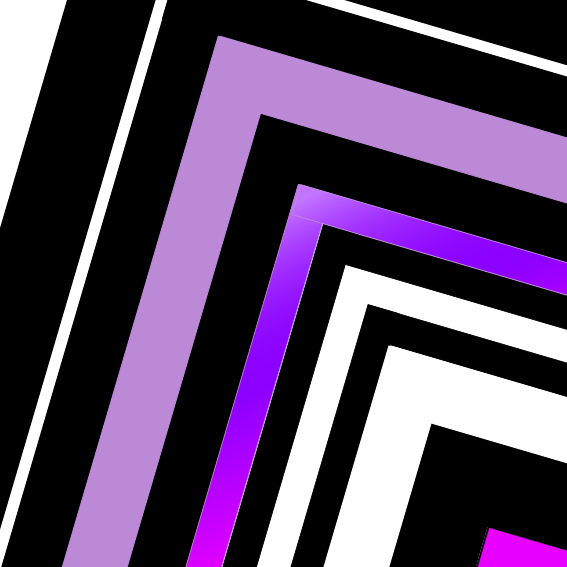
I decided to make a print with my second mood board The Bold Stripes and Dark Colours. I thought it might be more interesting and fun to experiment with darker colours on fabric. My design contained a purple and light blue theme but I wanted to add more colour to my design so I added some pinks.
My final three designs looked like this.
We are hope you have gotten inspired by this whole creative process. Stay creative!
Get your math skills ready for this fabric repeat pattern tutorial in Illustrator. We would recommend to start with repeating simple objects first to understand the concept of repeating pattern in Illustrator, once it is understood nothing will stop you to create!
Full Drop Repeat in Illustrator
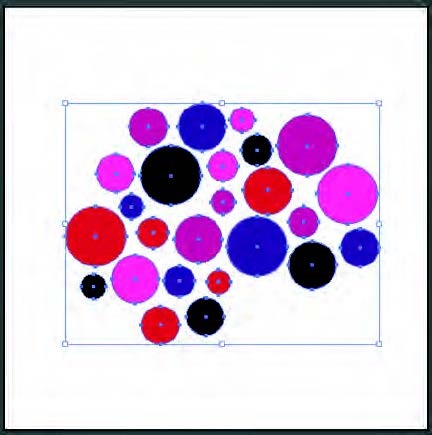
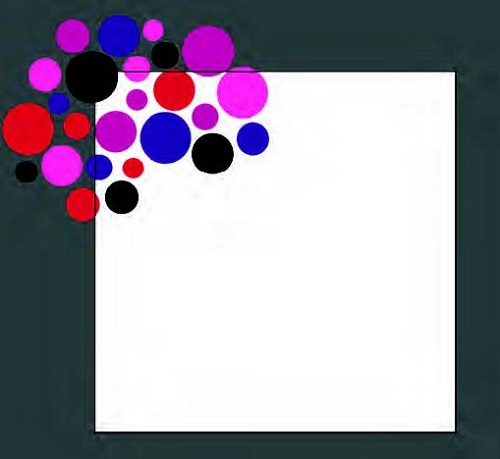
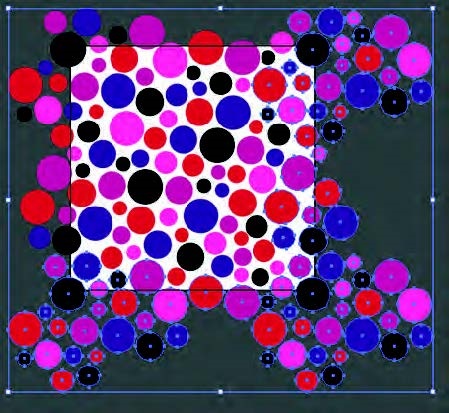
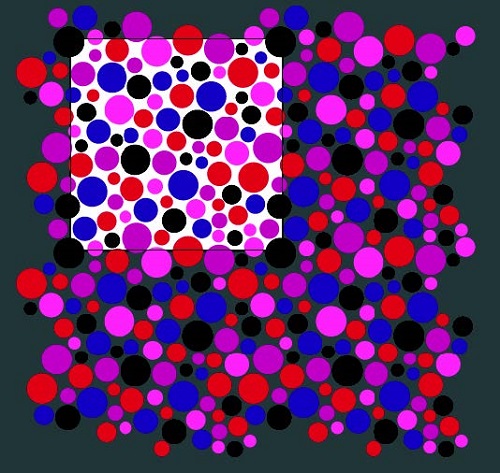
Either open up an existing illustrator file or begin by developing your vector image that you desire to repeat. We have started with a basic spot, varying the size and colour to add variety and this will form the base of the repeat.
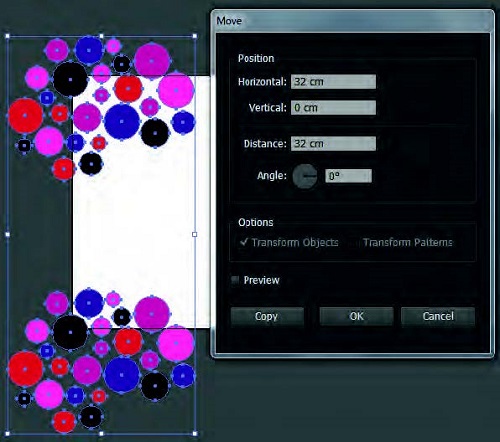
Set up your art board to your desired repeat size. This depends on your end product, but to start off with, work with squares to help with calculations. We have set up my repeat to be 32 x 32 cm. For interested sake, this is a standard rotary repeat set up. Place your initial artwork to the top left corner of the art board, letting it hang over the edge.
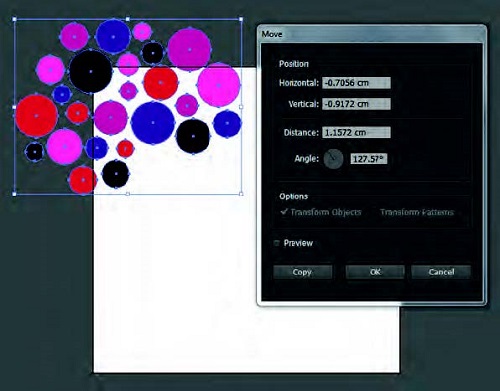
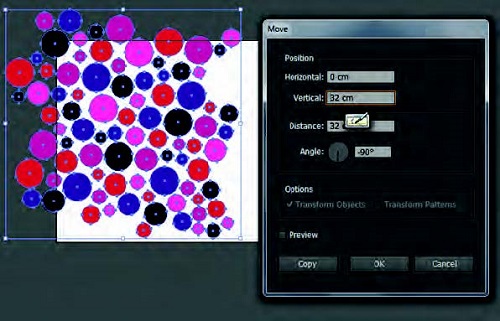
Select all objects (sometimes helpful to group them so you don’t miss any when duplicating). Double click on the black selection tool in the tools panel and a dialogue box will appear.
This is how you can move objects an exact amount i.e. the repeat size and know that all objects within that repeat will align perfectly.
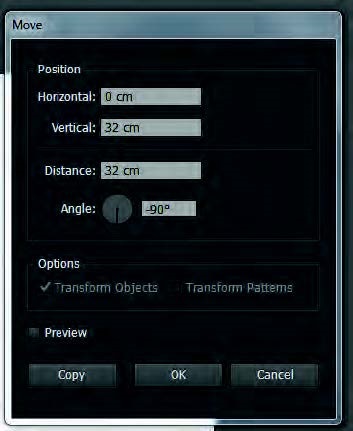
First duplicate the selected objects the repeat size down or vertically. This repeat is 32 cm, so they are moved 32 cm vertically.
Make sure the horizontal value is 0. Click COPY.
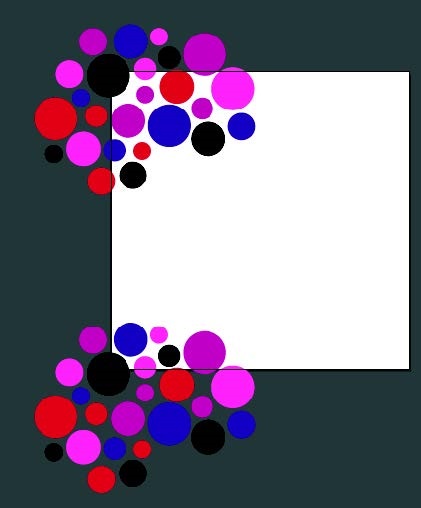
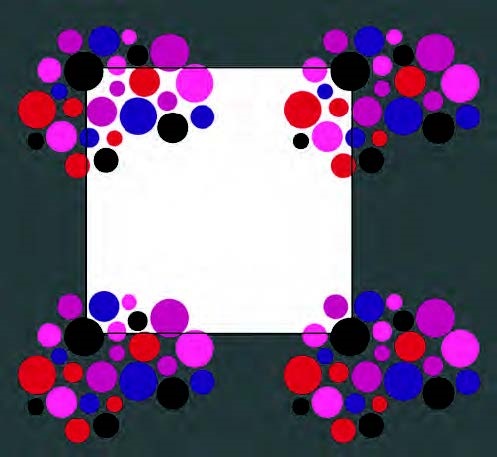
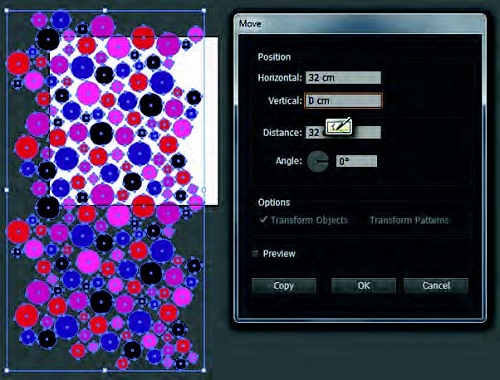
Now repeat horizontally by selecting both groups of objects along the left side. When in the move dialogue box make sure the horizontal value is the repeat size and the vertical value is 0. Click COPY.
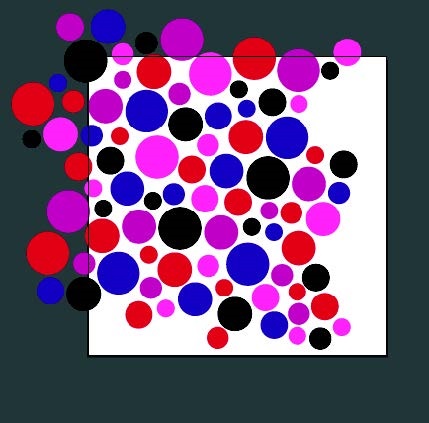
Now is the time to fill in the blank space in the middle with additional objects.
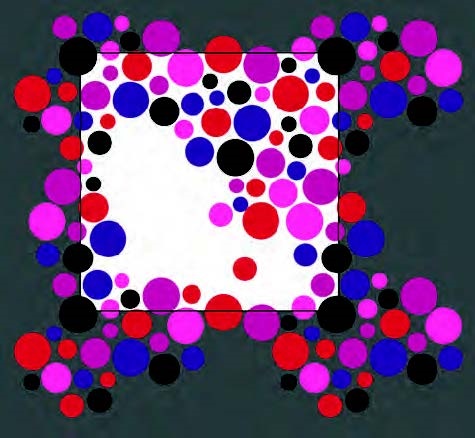
Tip: Lock the three extra sides of the repeat or put them on a separate locked layer so they can be easily deleted in a following step. This may require some more advance knowledge of illustrator, but don’t let this deter you if you are new, it could be helpful in mastering the program! The level of difficulty here will greatly depend on the style and type of original artwork you are using and will call into play several design elements and principles such as space, balance and unity. Watch out for anything that forms a definite line or track mark through your design. You may need to shift or adjust parts of your original artwork to make the repeat work, in which case is can be a good idea to work in layers (with a copy of the original locked) in case you want to jump back to the beginning.
Work towards filling in the edges, duplicating them down/across to the repeat edges, till all you have is the middle to fill.
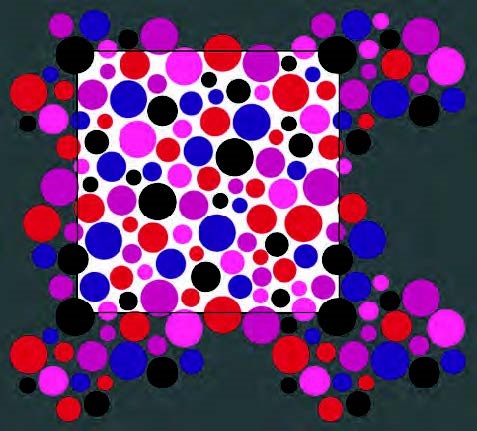
Continue until you are happy with the flow and feel of the design.
Now delete the three extra sides that were locked or moved to another layer. Then repeat the duplicating sequence with all the added areas/dots of the design. This will help you check anything that may have doubled up or just doesn’t look right in the repeat.
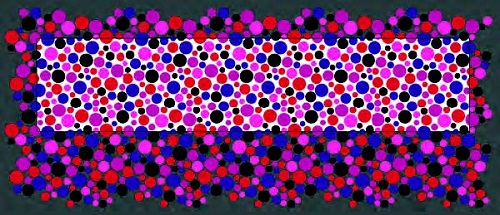
When you are satisfied with your repeat tile, you can set it up for digital fabric printing. Position two repeat tiles (vertically) so they hang over the left side of the art board. Increase the artwork WIDTH to the width of the fabric (in this case 147cm), keep the height of the art board as the repeat size.
Duplicate the selected objects across the width of the art board so it is covered completely. Tip: Once you have used the move tool to move the exact repeat size and clicked copy, ctrl D to duplicate the exact last action.
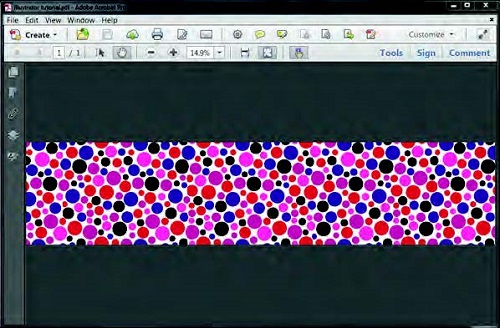
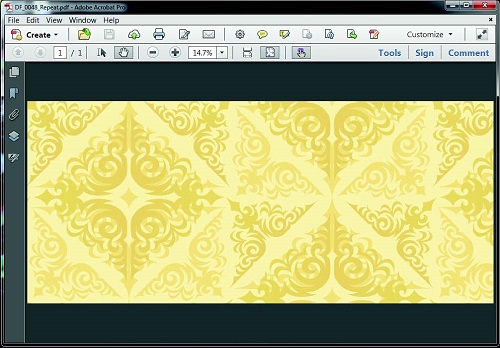
Save As a PDF. Even though there are objects hanging off the edge of the art board, because they have been moved the exact repeat size, they will all meet up when printed seamlessly. This is now your Full Width Repeat Tile which repeats top and bottom you can use it for digital custom fabric printing.
Using Illustrator for repeats can sometimes be quicker and less labour intensive than using Photoshop, but it all comes down to the type of file you start with or the style of artwork you’re after. Stick to illustrator for vector files and images with a very “graphic” orientation, bearing in mind how the artwork was originally generated. Avoid using a jpg, tiff, psd or Photoshop eps you will lose the inherent quality of the original artwork.
Half Drop Repeat in Illustrator
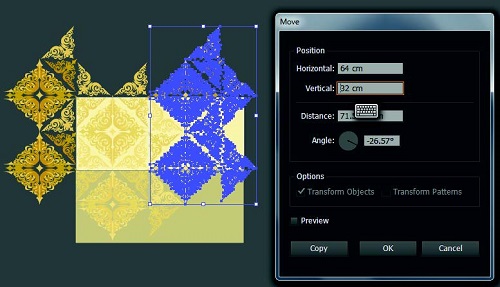
To practise your fabric design skills you can use an existing illustrator artwork. Open up an existing illustrator artwork or create a new vector graphic to your specifications. Set up your art board to the repeat size that you’d prefer. Here I’m using a 64 cm repeat. Starting off with squares can be easier to work out half measurements at a late step.
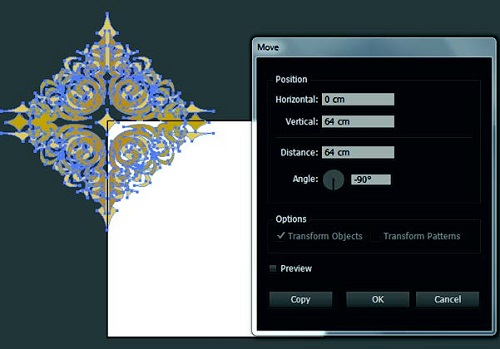
When you are happy with your artwork, move it to the top left corner of your art board so it hangs off the edge. Double click on the move tool to duplicate (click copy) the object the exact repeat size vertically.
Now with all objects selected, use the move tool again. This time you will duplicate the objects across the full repeat width but down by HALF the repeat size, in this case 64 x 32 cm. Click copy.
At this stage you can adjust the scale of the original object or add in additional motifs. This is not always necessary and depends on your individual artwork but it has the potential to add variety and interest
in the overall design.
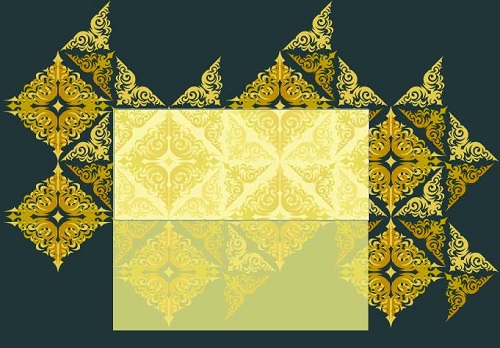
N.B. Don’t forget that what happens on the top ‘line’ of your artboard must happen on the bottom i.e. repeat
When you are happy with the layout for your half drop, delete any duplicated objects (across the right side and bottom of art board) so that you only have one group of objects.
Adjust the artboard dimension to to be a full print width, in this case 147cm and proceed to duplicate the objects so that it fills and over hangs the artboard. Remember that it is a half drop, so follow the previous steps for duplication.
A colour overlay was added purely for aesthetic purposes. Save as pdf as previous tutorial.
Get your math skills ready for this fabric repeat pattern tutorial in Illustrator. We would recommend to start with repeating simple objects first to understand the concept of repeating pattern in Illustrator, once it is understood nothing will stop you to create!
Full Drop Repeat in Illustrator
Either open up an existing illustrator file or begin by developing your vector image that you desire to repeat. We have started with a basic spot, varying the size and colour to add variety and this will form the base of the repeat.
Set up your art board to your desired repeat size. This depends on your end product, but to start off with, work with squares to help with calculations. We have set up my repeat to be 32 x 32 cm. For interested sake, this is a standard rotary repeat set up. Place your initial artwork to the top left corner of the art board, letting it hang over the edge.
Select all objects (sometimes helpful to group them so you don’t miss any when duplicating). Double click on the black selection tool in the tools panel and a dialogue box will appear.
This is how you can move objects an exact amount i.e. the repeat size and know that all objects within that repeat will align perfectly.
First duplicate the selected objects the repeat size down or vertically. This repeat is 32 cm, so they are moved 32 cm vertically.
Make sure the horizontal value is 0. Click COPY.
Now repeat horizontally by selecting both groups of objects along the left side. When in the move dialogue box make sure the horizontal value is the repeat size and the vertical value is 0. Click COPY.
Now is the time to fill in the blank space in the middle with additional objects.
Tip: Lock the three extra sides of the repeat or put them on a separate locked layer so they can be easily deleted in a following step. This may require some more advance knowledge of illustrator, but don’t let this deter you if you are new, it could be helpful in mastering the program! The level of difficulty here will greatly depend on the style and type of original artwork you are using and will call into play several design elements and principles such as space, balance and unity. Watch out for anything that forms a definite line or track mark through your design. You may need to shift or adjust parts of your original artwork to make the repeat work, in which case is can be a good idea to work in layers (with a copy of the original locked) in case you want to jump back to the beginning.
Work towards filling in the edges, duplicating them down/across to the repeat edges, till all you have is the middle to fill.
Continue until you are happy with the flow and feel of the design.
Now delete the three extra sides that were locked or moved to another layer. Then repeat the duplicating sequence with all the added areas/dots of the design. This will help you check anything that may have doubled up or just doesn’t look right in the repeat.
When you are satisfied with your repeat tile, you can set it up for digital fabric printing. Position two repeat tiles (vertically) so they hang over the left side of the art board. Increase the artwork WIDTH to the width of the fabric (in this case 147cm), keep the height of the art board as the repeat size.
Duplicate the selected objects across the width of the art board so it is covered completely. Tip: Once you have used the move tool to move the exact repeat size and clicked copy, ctrl D to duplicate the exact last action.
Save As a PDF. Even though there are objects hanging off the edge of the art board, because they have been moved the exact repeat size, they will all meet up when printed seamlessly. This is now your Full Width Repeat Tile which repeats top and bottom you can use it for digital custom fabric printing.
Using Illustrator for repeats can sometimes be quicker and less labour intensive than using Photoshop, but it all comes down to the type of file you start with or the style of artwork you’re after. Stick to illustrator for vector files and images with a very “graphic” orientation, bearing in mind how the artwork was originally generated. Avoid using a jpg, tiff, psd or Photoshop eps you will lose the inherent quality of the original artwork.
Half Drop Repeat in Illustrator
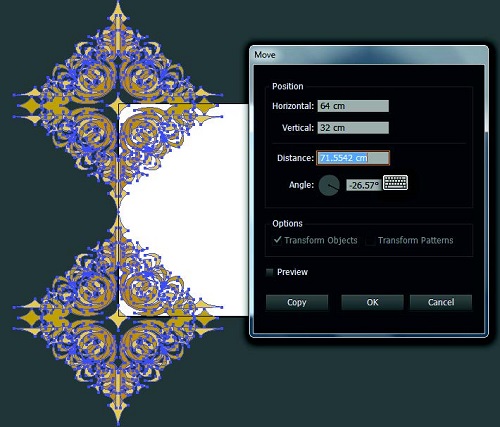
To practise your fabric design skills you can use an existing illustrator artwork. Open up an existing illustrator artwork or create a new vector graphic to your specifications. Set up your art board to the repeat size that you’d prefer. Here I’m using a 64 cm repeat. Starting off with squares can be easier to work out half measurements at a late step.
When you are happy with your artwork, move it to the top left corner of your art board so it hangs off the edge. Double click on the move tool to duplicate (click copy) the object the exact repeat size vertically.
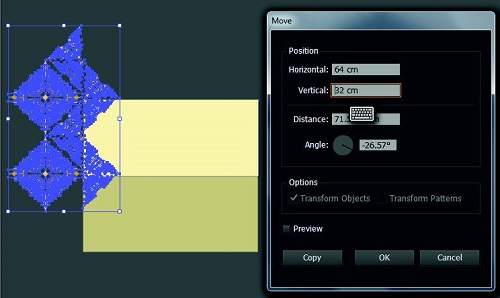
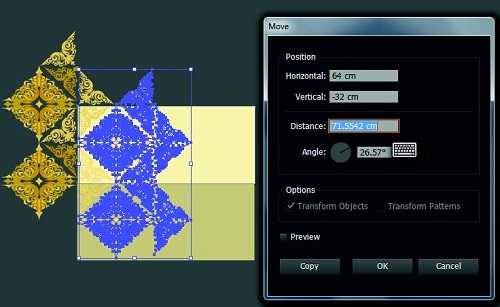
Now with all objects selected, use the move tool again. This time you will duplicate the objects across the full repeat width but down by HALF the repeat size, in this case 64 x 32 cm. Click copy.
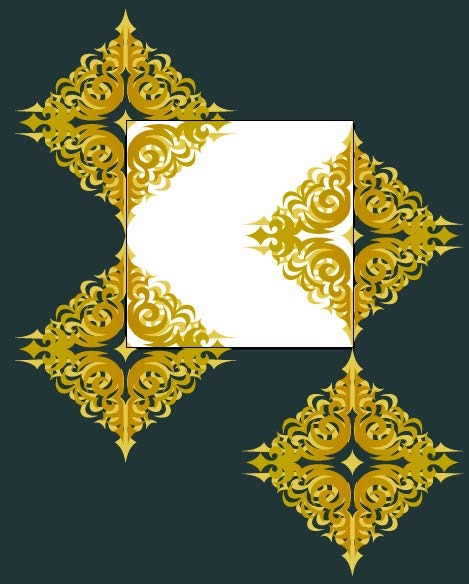
At this stage you can adjust the scale of the original object or add in additional motifs. This is not always necessary and depends on your individual artwork but it has the potential to add variety and interest
in the overall design.
N.B. Don’t forget that what happens on the top ‘line’ of your artboard must happen on the bottom i.e. repeat
When you are happy with the layout for your half drop, delete any duplicated objects (across the right side and bottom of art board) so that you only have one group of objects.
Adjust the artboard dimension to to be a full print width, in this case 147cm and proceed to duplicate the objects so that it fills and over hangs the artboard. Remember that it is a half drop, so follow the previous steps for duplication.
A colour overlay was added purely for aesthetic purposes. Save as pdf as previous tutorial.
Mirror repeat technic is one of the easiest way to make a repeat pattern with any digital image, photographs, graphic artwork or painting. Mirror repeat creates an interesting effect, simple and quick, doesn’t require great Photoshop skills. To design your own fabric you can either use our Photoshop tutorial or Fabric Uploader with an instant Mirror repeat option.
Mirror Repeat Tutorial in Photoshop
Open your artwork in Photoshop, make any adjustments to the dimensions (width/height) at this stage.
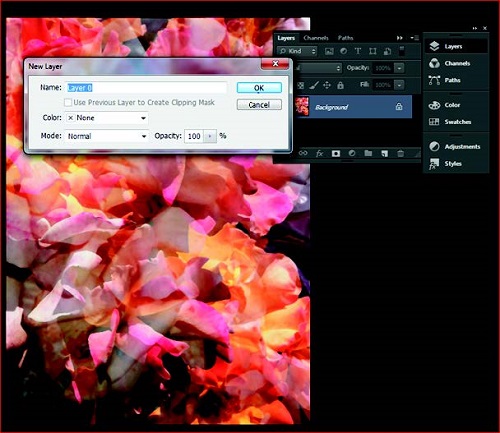
Double click (press OK) the background layer in your layers panel so it is no longer locked.
Increase your artboard size, go to Menu > Image > Canvas Size > double the width of the canvas size making sure to click the left arrow so the increase only happens to one side.
Now duplicate the original layer by clicking and dragging it to the second from the right icon at the base of the layers panel.
With the duplicated layer selected go to Menu>Edit>Transform>Flip Horizontally>OK. Drag the flipped layer across (holding down SHIFT key) so the layer slots into place in line with the original layer. Make sure to zoom into mirroed join beetwin the images to double check that no pixels are out. Merge layers by sellecting them both, right click and choose Merger Layers option.
Repeat this step again, but mirroring the length/height of the image. When you transform the duplicated layer, make sure to flip VERTICALLY before dragging into place.
Flatten the layers, right click on one of the layers, select Flatten Image option. This is now your mirrored repeat tile that repeats
seamlessly on all four sides! Now you can use your design for digital custom fabric printing.
Mirror repeat technic is one of the easiest way to make a repeat pattern with any digital image, photographs, graphic artwork or painting. Mirror repeat creates an interesting effect, simple and quick, doesn’t require great Photoshop skills. To design your own fabric you can either use our Photoshop tutorial or Fabric Uploader with an instant Mirror repeat option.
Mirror Repeat Tutorial in Photoshop
Open your artwork in Photoshop, make any adjustments to the dimensions (width/height) at this stage.
Double click (press OK) the background layer in your layers panel so it is no longer locked.
Increase your artboard size, go to Menu > Image > Canvas Size > double the width of the canvas size making sure to click the left arrow so the increase only happens to one side.
Now duplicate the original layer by clicking and dragging it to the second from the right icon at the base of the layers panel.
With the duplicated layer selected go to Menu>Edit>Transform>Flip Horizontally>OK. Drag the flipped layer across (holding down SHIFT key) so the layer slots into place in line with the original layer. Make sure to zoom into mirroed join beetwin the images to double check that no pixels are out. Merge layers by sellecting them both, right click and choose Merger Layers option.
Repeat this step again, but mirroring the length/height of the image. When you transform the duplicated layer, make sure to flip VERTICALLY before dragging into place.
Flatten the layers, right click on one of the layers, select Flatten Image option. This is now your mirrored repeat tile that repeats
seamlessly on all four sides! Now you can use your design for digital custom fabric printing.
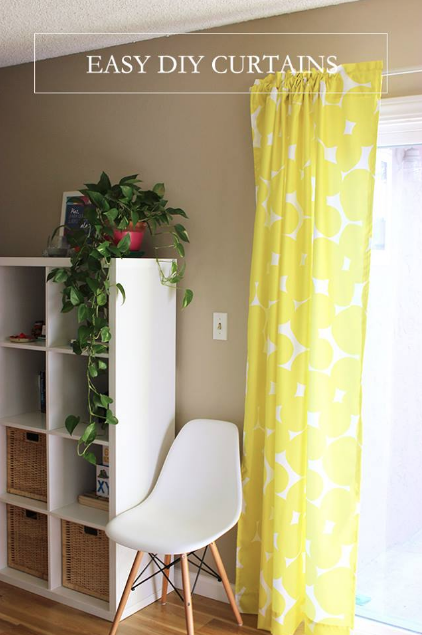
If you’re looking to give a bright make over to your home, this DIY project is for you! Curtains are a great way to add color and pattern to your home and they are so easy to make.
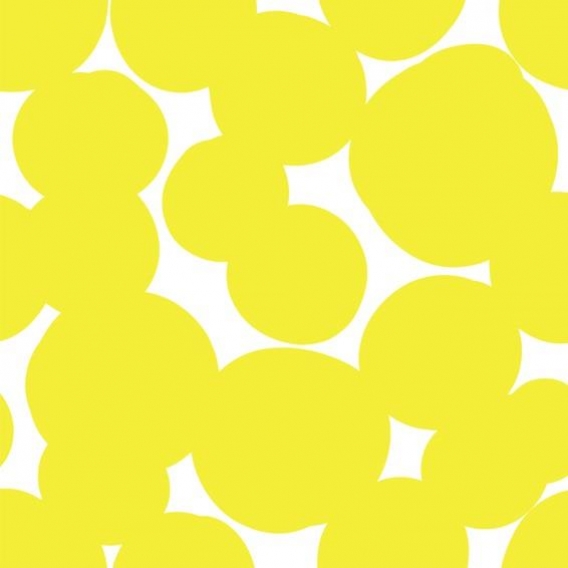
Elba from Live Colorful shows us how, with her easy DIY curtains tutorial, which she made using the Lemonade fabric she created with Digital Fabrics!
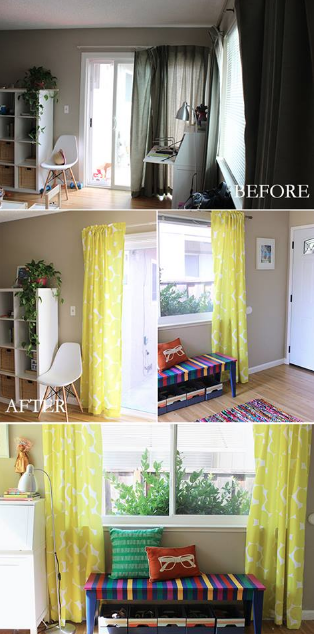
A couple months ago she moved into her new home, but if you’ve ever been through it you know how hectic a move can be. She had her eye on the ugly gray-green curtains that she wanted to change and now, thanks to the Lemonade fabric she created with Digital Fabrics, she had the perfect DIY opportunity to give this space a bright and personal touch.
Elba hasn’t been able to find prints that she loves, so inspired by that, she created the LIVE COLORFUL collection which features bright and happy prints that are perfect for many DIY home decor projects.
You can also win 2 meters of one of her designs so make sure you go check it out.
If you’re looking to give a bright make over to your home, this DIY project is for you! Curtains are a great way to add color and pattern to your home and they are so easy to make.
Elba from Live Colorful shows us how, with her easy DIY curtains tutorial, which she made using the Lemonade fabric she created with Digital Fabrics!
A couple months ago she moved into her new home, but if you’ve ever been through it you know how hectic a move can be. She had her eye on the ugly gray-green curtains that she wanted to change and now, thanks to the Lemonade fabric she created with Digital Fabrics, she had the perfect DIY opportunity to give this space a bright and personal touch.
Elba hasn’t been able to find prints that she loves, so inspired by that, she created the LIVE COLORFUL collection which features bright and happy prints that are perfect for many DIY home decor projects.
You can also win 2 meters of one of her designs so make sure you go check it out.
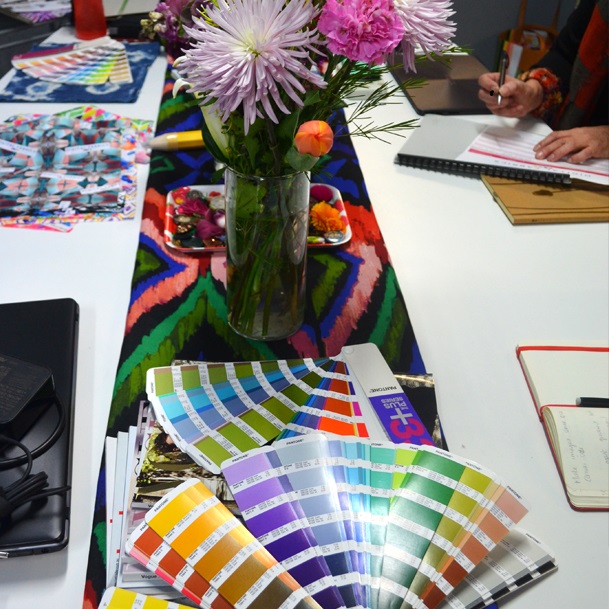
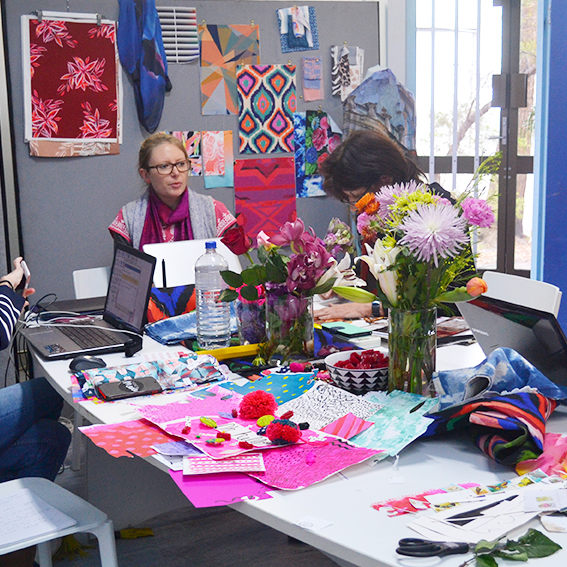
Our first workshop happened a few weekends ago at the Digital Fabrics School and it was a great day!
There were 4 students ranging in experience and knowledge and it was a fun day learning, sharing and exploring the digital process of designing a scarf from creating a collage to the digital process.
An early start on a winter’s day meant plenty of snacks and cups of tea for fuel while learning about Textile design from our expert teacher Liz Godkin. Liz has extensive industry experience including working at a fashion house in New York and freelance design across Australia and she shared tricks of the trade and useful tips for designing textile products for both personal and commercial projects.
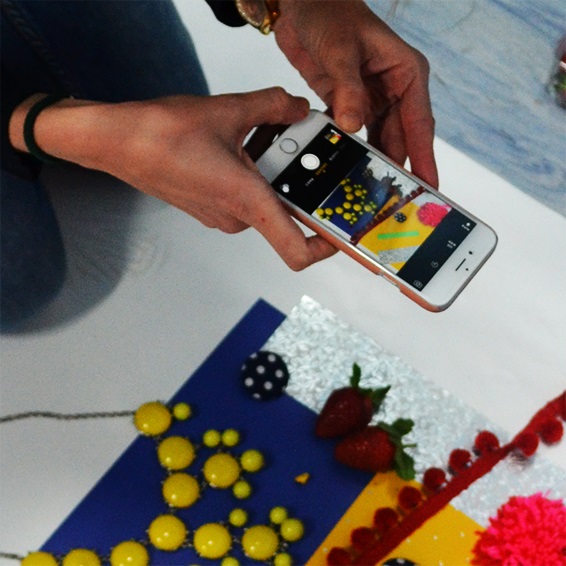
Students were getting back to basics and making flat lays which were to be the base of the scarf designs with flowers, leaves, lace, poms poms and even their own artwork. One student loved using her professional photography skills to capture the design! It’s great to work with your hands before turning it digital as it gives you a wider understanding of the process and how designs can come from anywhere.
After a much needed break for some delicious sushi, more tea and it was time to take the collage into Photoshop. Few hours were spent learning how to use the manipulation tools, layers, filters and blending tools amongst many other aspects in PS. Liz was constantly offering information , shortcuts and in depth knowledge. As it was a very small class, she always had time to help students one on one which is great and definitely makes a difference.
The feedback that we received is great and are excited about the upcoming workshops and the future of the Digital Fabrics School. If you have been thinking about attending one, DO IT! You will learn some great new skills and make new friends along the way. What’s better than that?
We have lots of ideas and are thinking about lots of potential fun things to learn and make together!
 Design experimentation and development