Tag Archives: design your own leggings

Design Your Own Leggings – How to prepare legging pattern for fabric printing in Illustrator

Garment making and production can be daunting and a complicated process especially placement or engineered printing. A lot of time and effort goes into research and understanding where to start. We have put together tutorials on how to design, work with and prepare legging pattern for digital placement fabric printing. For this tutorial  you need to be proficient in Illustrator or at least have basic knowlage. Our tutorial is based on industry standards. This technic can be applied to printing other products such as bikinis, t-shirts, singlets , dresses etc.

How to prepare legging pattern for digital fabric printing in Illustrator

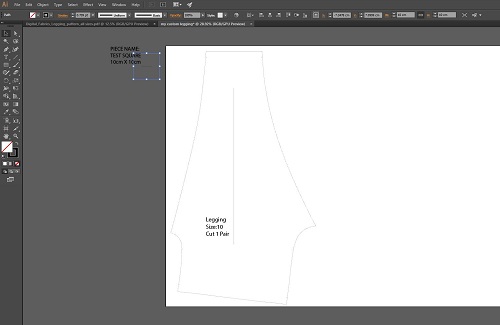
Open the PDF file in Illustrator. You can purchase our digital leggings pattern on our website or use your own.

The top left square will help you determine if the scaling of your patterns are correct, this square should always be 10x10cm.

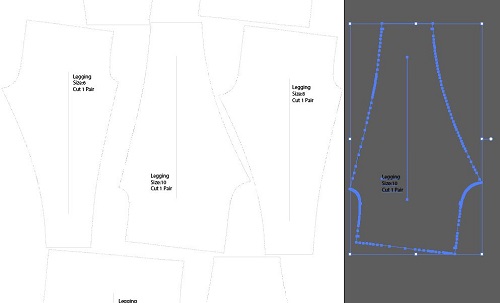
Select the size you’d like to have printed (we have selected size 10) and while holding shift also select the scale square. Copy selection

leggings_design_pattern_tutorial_printing_digitalfabrics_1

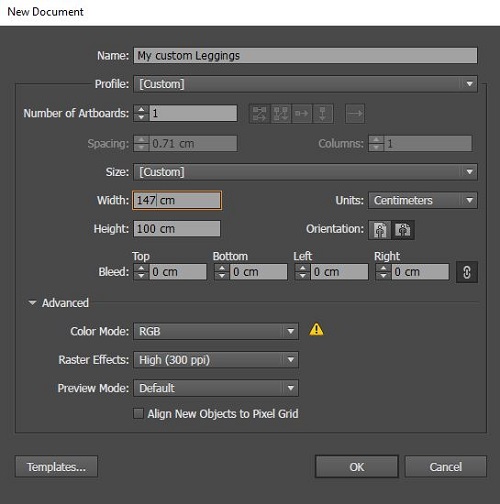
You’ll now have to create a new document. Make sure to set up to the width of the fabric (we’ve chosen to proceed with matte Lycra which as a printable width of 147cm)  x the length of the print, this size legging will not exceed the 1 metre.

Design_tutorial_digitalfabrics_printing_2

Paste the pattern piece and square scale into new artboard. The left and right hand side is where the selvage of your fabric will be, make sure you always keep the grain line (line within Patten) parallel to the selvage.

Tutorial_fashion_legging_fabric_printing_3

You can now double check the square scale which should remain 10x10cm and delete or move off the artboard and position the legging where you’d like.

fabric_printing_pattern_legging_fashion_4

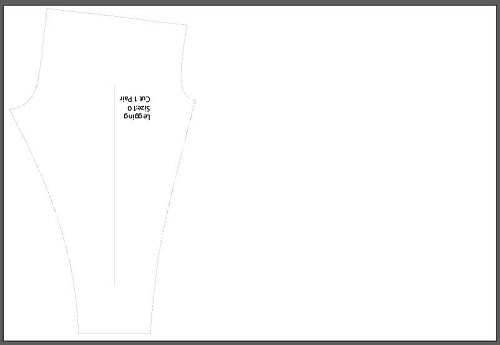
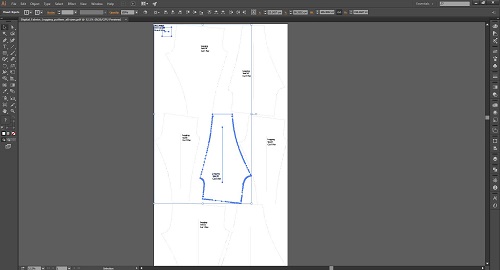
Rotate your leggings so that they are the right way up, make sure that the centre line (grain line) is always parallel to the selvage (left and right sides of your artboard). Select the pattern including all notches details and grain line and rotate while holding down the shift key to ensure it rotated exactly how you need it.

right_legging_pattern_design_tutorial_diy

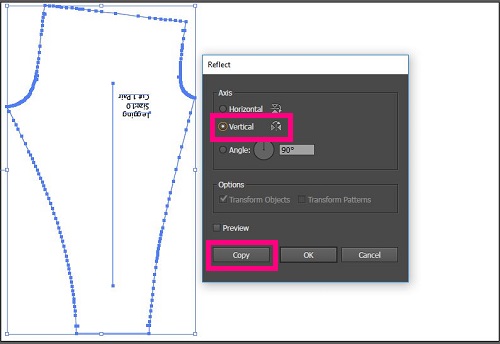
To make a pair,  copy this leg pattern by selecting the shape of the pattern and once selected go to Object>transform>reflect and select vertical Axis and click copy.

layout_tutorial_design_fabric_printing_5

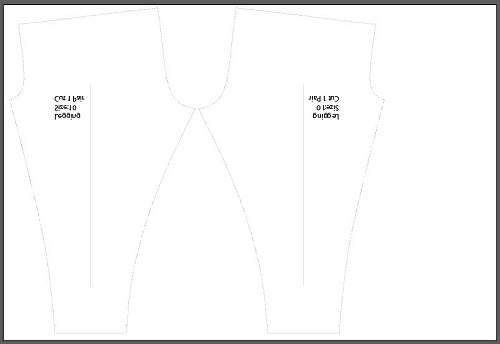
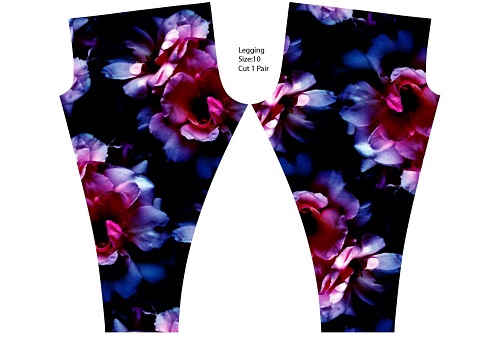
You now have a pair.

Leggings_ pattern_design_fabric_printing

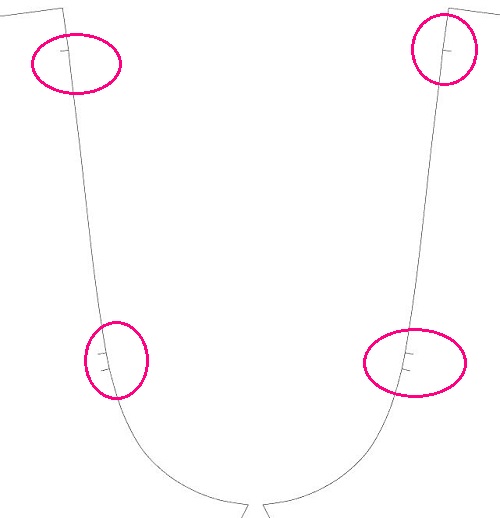
You can now delete the grain line and text, but keep all notches, you will need them for making. For this tutorial we’ve left the text from one of the legs to print, if you are thinking about printing several sizes it will very helpful to have this information next to each size to avoid confusion. Notches are the little nicks which are around the patterns which will help when constructing the leggings.

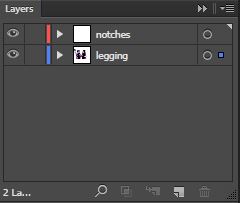
Copy all notches and paste into new layer for later use.  Make sure you select all notches and if for any reason you are moving the legging pattern make sure you select the notches layer so that they move together.

Notches_design_tutorial_leggings_patterns

layers_legging_pattern_digitalfabrics

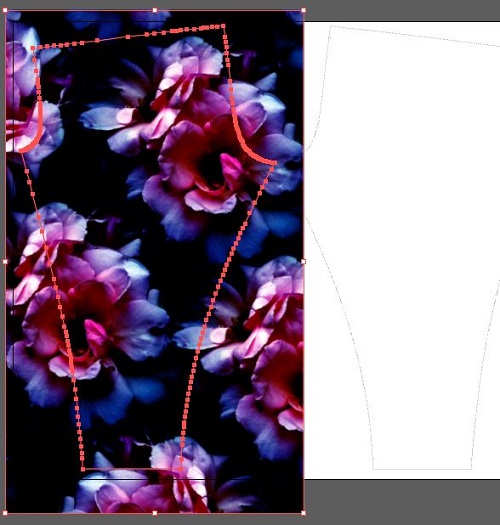
Open up the design you would like to use, make sure the design has been setup slightly larger than the legging pattern size roughly 110cm long x 65cm wide and copy and paste into the artboard.

Select design >object>arrange>send to back.

arrange_layout_setup_legging_print_fabric

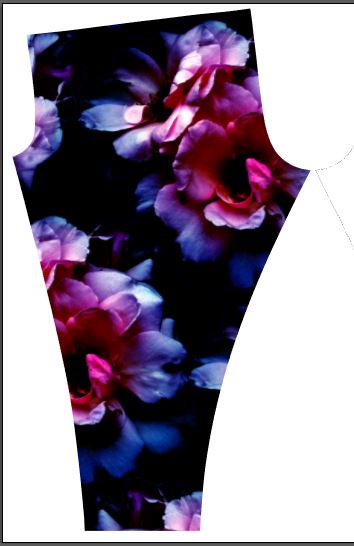
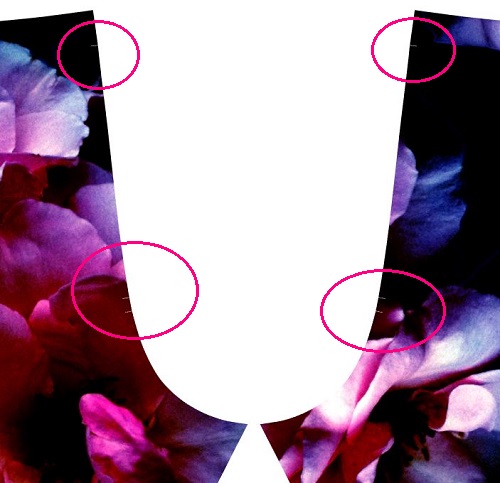
With both the artwork/design and legging pattern selected Object>clipping mask>make. Now you can only see your design in a shape of a leg pattern.

clipping mask_ilustrator_tutorial_diy

Repeat for other leg.

Select all notches in other layer and change the colour so they become visible.

notches_fabricprinting_design_print_leggings

Group all layers including leggings and notches and centre, your file is now ready to submit to have printed.
group_fabric_printing_legging_tutorial


Save

Save

Save

Save

Save

Design your own leggings – How to prepare legging pattern for fabric printing in Photoshop

Garment making and production can be daunting and a complicated process especially placement or engineered printing. A lot of time and effort goes into research and understanding where to start. We have put together tutorials on how to design, work with and prepare legging pattern for digital placement fabric printing. For this tutorial  you need to be proficient in Photoshop and Illustrator or at least have basic knowlage. Our tutorial is based on industry standards. This technic can be applied to printing other products such as bikinis, t-shirts, singlets , dresses etc.

How to prepare legging pattern for fabric printing in Photoshop

Open the PDF file in Illustrator. You can purchase our digital leggings pattern on our website or use your own.

Copy and paste the size you would like to use within the same file, we have selected size 10.

Photoshop_design_pattern_fabric_printing_leggings

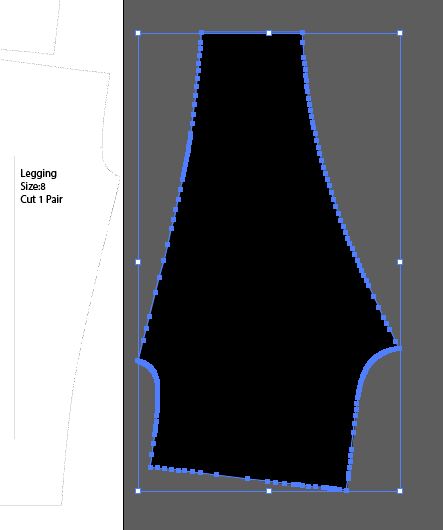
Delete all details and notches within the pattern piece and select the pattern shape and fill in black.

fashion_legging_design_digitalfabrics_printing

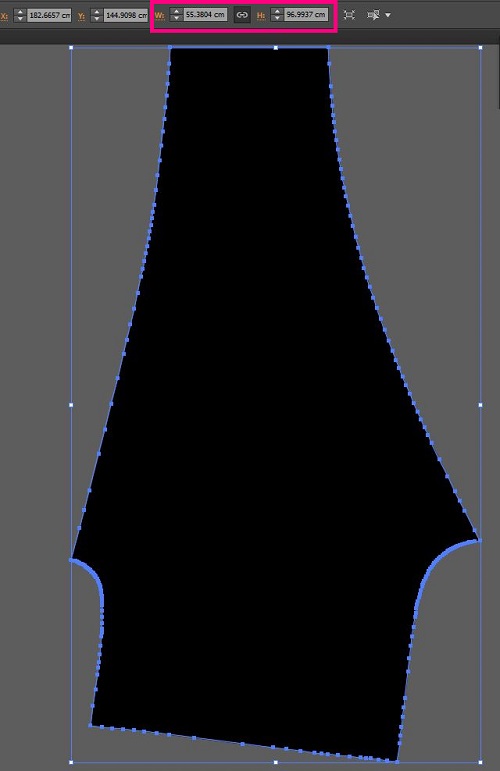
while legging is selected copy and take note on the sizing.

selection_legging_size_prints_fabric_lycra

Open Photoshop and select a new artboard, keep the pixels and resolution the same, just make sure you’ve selected RGB color mode. Click OK and Paste pattern piece as a smart object, click enter to place.

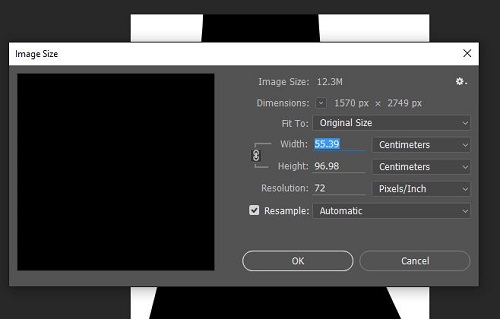
Double check that the sizing is correct by selecting Image>image size, in this case it is only a few points off which will be fine.

Design_tutorial_fashion_legging_black

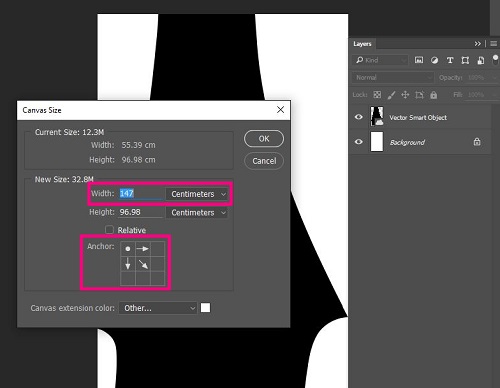
Next you’ll need to increase your artboard size to fit the other leg, change the width of your artboard to the width of the fabric you’d like to use and select the anchor points to extend from corner.

tutorial_design_fabric_digitalfabrics_legging

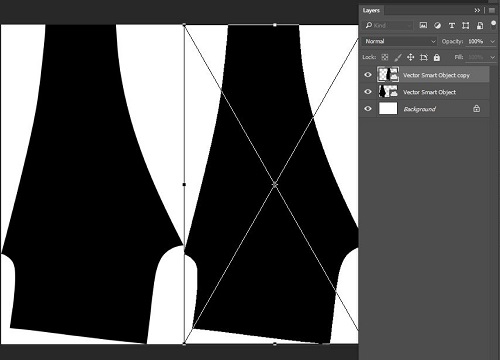
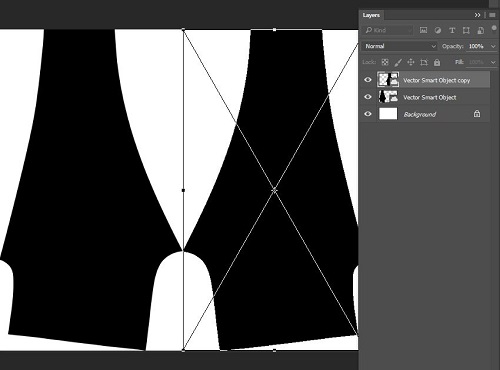
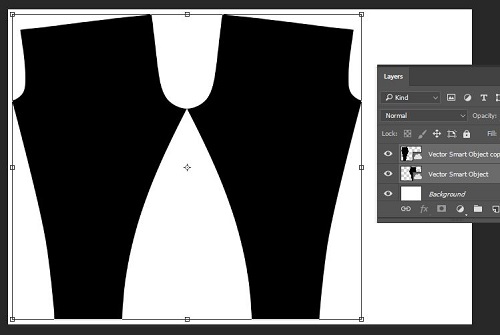
Copy Layer and while selected transform (Ctrl+t), while still selected right click on top of the layer and select Flip Horizontally, you know have a pair.

fabric_printing_tutorial_design

photoshop_tutorial_legging_fabric

With both layers selected you will need to select transform again (ctrl+t) and while select cover over to rotate, when rotating make sure you hold down shift to make sure it rotates correctly.

Right_photoshop_design_legging_tutorial

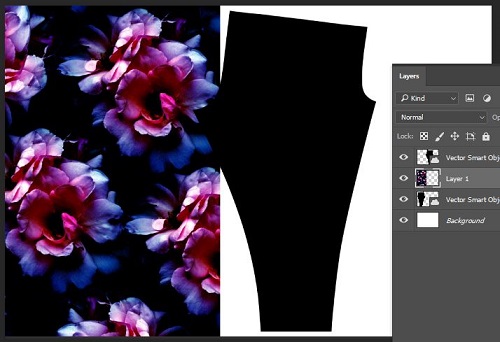
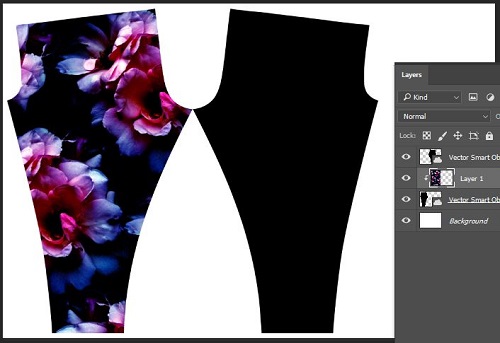
Copy and paste the design you would like on your leggings and place layer on top of the one of the pattern legs.

pattern_legging_fashion_design_printing

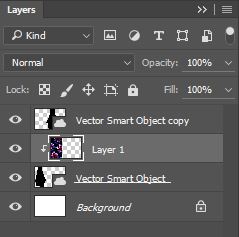
Right click on the design layer and in the drop down menu select create clipping mask.

layers_photoshop_design_fabric

clipping_mask_design_legging_luxe_sports

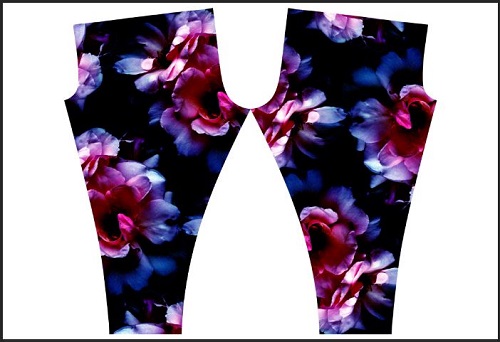
Repeat for other leg

Group all layers and centre.

Your file is now ready to print!

leggings_sportsluxe_fintess_sport_fit_fashion

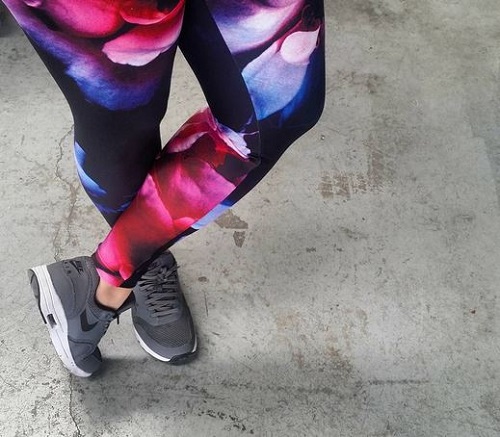
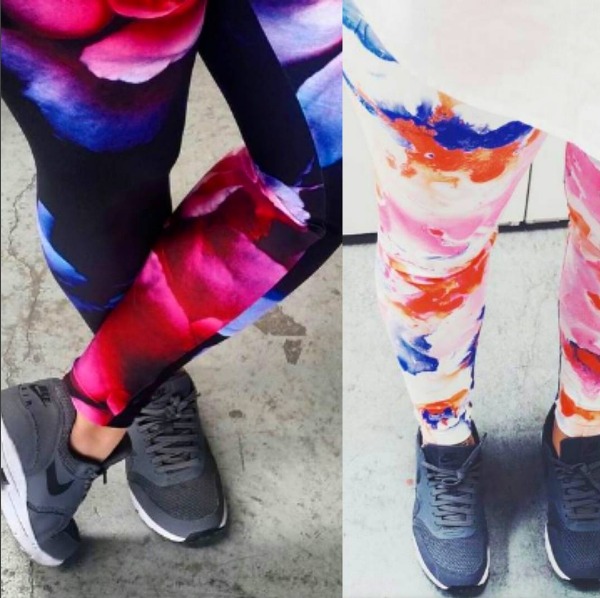
Soon you’ll have your printed fabric which you’ll be able to whip up into these comfy leggings

legging_sports_luxe_design_fasion_rose_print


Save

Design Your Own Leggings – How to prepare legging pattern for fabric printing in Illustrator

Garment making and production can be daunting and a complicated process especially placement or engineered printing. A lot of time and effort goes into research and understanding where to start. We have put together tutorials on how to design, work with and prepare legging pattern for digital placement fabric printing. For this tutorial  you need to be proficient in Illustrator or at least have basic knowlage. Our tutorial is based on industry standards. This technic can be applied to printing other products such as bikinis, t-shirts, singlets , dresses etc.

How to prepare legging pattern for digital fabric printing in Illustrator

Open the PDF file in Illustrator. You can purchase our digital leggings pattern on our website or use your own.

The top left square will help you determine if the scaling of your patterns are correct, this square should always be 10x10cm.

Select the size you’d like to have printed (we have selected size 10) and while holding shift also select the scale square. Copy selection

leggings_design_pattern_tutorial_printing_digitalfabrics_1

You’ll now have to create a new document. Make sure to set up to the width of the fabric (we’ve chosen to proceed with matte Lycra which as a printable width of 147cm)  x the length of the print, this size legging will not exceed the 1 metre.

Design_tutorial_digitalfabrics_printing_2

Paste the pattern piece and square scale into new artboard. The left and right hand side is where the selvage of your fabric will be, make sure you always keep the grain line (line within Patten) parallel to the selvage.

Tutorial_fashion_legging_fabric_printing_3

You can now double check the square scale which should remain 10x10cm and delete or move off the artboard and position the legging where you’d like.

fabric_printing_pattern_legging_fashion_4

Rotate your leggings so that they are the right way up, make sure that the centre line (grain line) is always parallel to the selvage (left and right sides of your artboard). Select the pattern including all notches details and grain line and rotate while holding down the shift key to ensure it rotated exactly how you need it.

right_legging_pattern_design_tutorial_diy

To make a pair,  copy this leg pattern by selecting the shape of the pattern and once selected go to Object>transform>reflect and select vertical Axis and click copy.

layout_tutorial_design_fabric_printing_5

You now have a pair.

Leggings_ pattern_design_fabric_printing

You can now delete the grain line and text, but keep all notches, you will need them for making. For this tutorial we’ve left the text from one of the legs to print, if you are thinking about printing several sizes it will very helpful to have this information next to each size to avoid confusion. Notches are the little nicks which are around the patterns which will help when constructing the leggings.

Copy all notches and paste into new layer for later use.  Make sure you select all notches and if for any reason you are moving the legging pattern make sure you select the notches layer so that they move together.

Notches_design_tutorial_leggings_patterns

layers_legging_pattern_digitalfabrics

Open up the design you would like to use, make sure the design has been setup slightly larger than the legging pattern size roughly 110cm long x 65cm wide and copy and paste into the artboard.

Select design >object>arrange>send to back.

arrange_layout_setup_legging_print_fabric

With both the artwork/design and legging pattern selected Object>clipping mask>make. Now you can only see your design in a shape of a leg pattern.

clipping mask_ilustrator_tutorial_diy

Repeat for other leg.

Select all notches in other layer and change the colour so they become visible.

notches_fabricprinting_design_print_leggings

Group all layers including leggings and notches and centre, your file is now ready to submit to have printed.
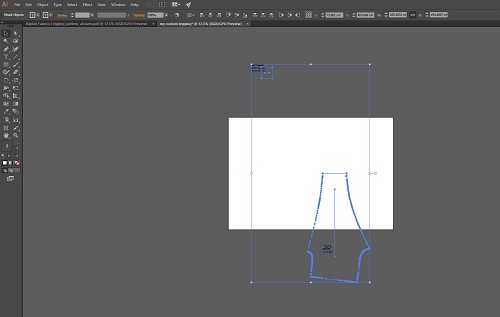
group_fabric_printing_legging_tutorial


Save

Save

Save

Save

Save

Designing Fabric: How To Make A Repeat Pattern – Full Drop Repeat in Illustrator

Get your math skills ready for this fabric repeat pattern tutorial in Illustrator. We would recommend to start with repeating simple objects first to understand the concept of repeating pattern in Illustrator, once it is understood nothing will stop you to create!

Full Drop Repeat in Illustrator

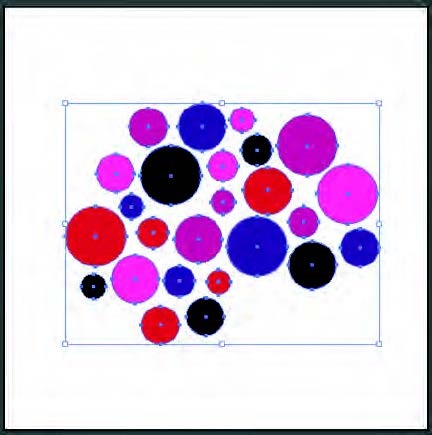
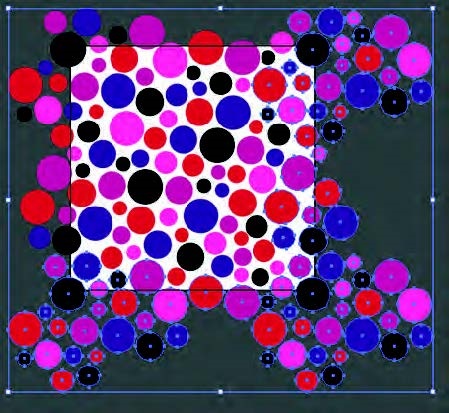
Either open up an existing illustrator file or begin by developing your vector image that you desire to repeat. We have started with a basic spot, varying the size and colour to add variety and this will form the base of the repeat.

full drop 1

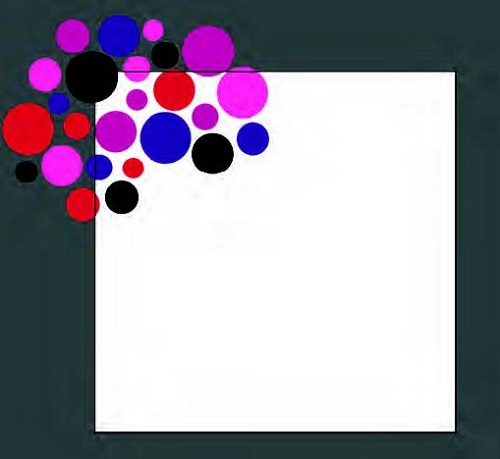
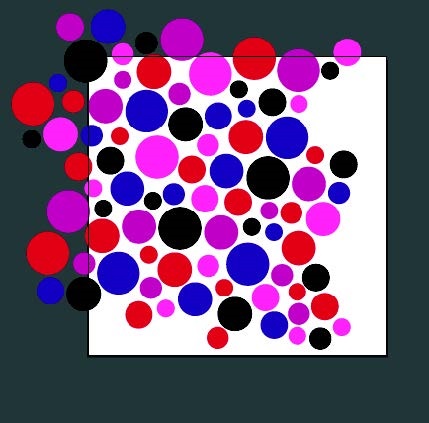
Set up your art board to your desired repeat size. This depends on your end product, but to start off with, work with squares to help with calculations. We have set up my repeat to be 32 x 32 cm. For interested sake, this is a standard rotary repeat set up. Place your initial artwork to the top left corner of the art board, letting it hang over the edge.

full drop 2

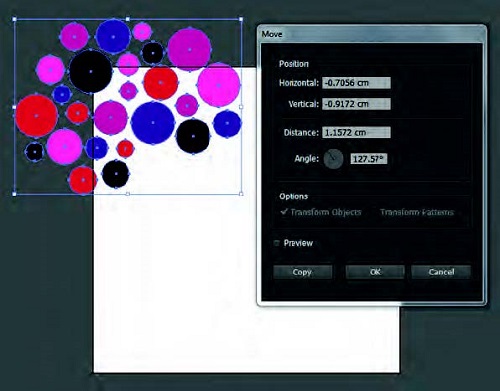
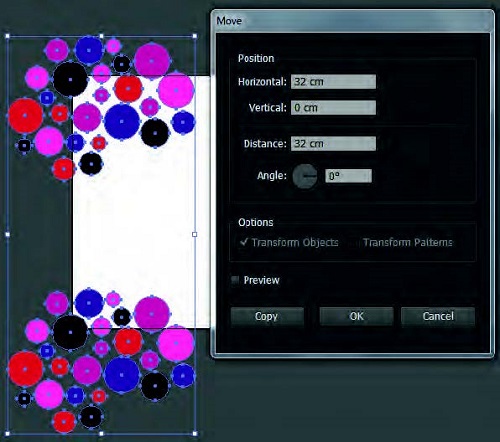
Select all objects (sometimes helpful to group them so you don’t miss any when duplicating). Double click on the black selection tool in the tools panel and a dialogue box will appear.

full drop 3

This is how you can move objects an exact amount i.e. the repeat size and know that all objects within that repeat will align perfectly.

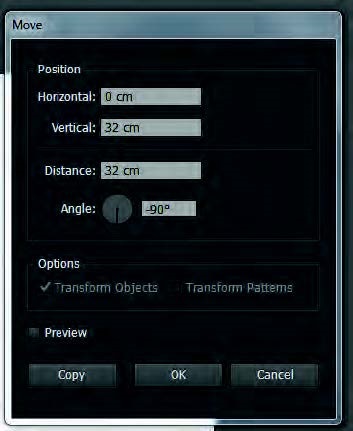
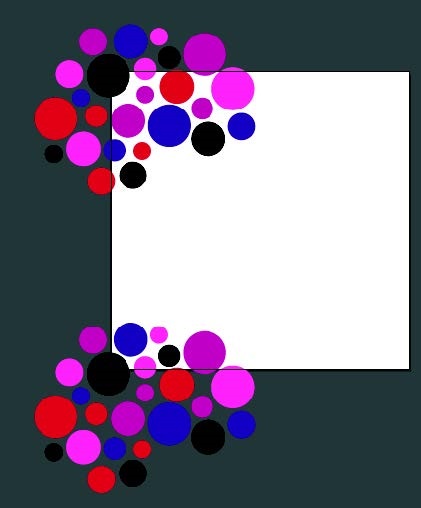
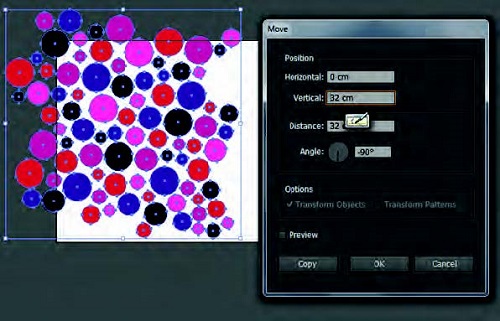
First duplicate the selected objects the repeat size down or vertically. This repeat is 32 cm, so they are moved 32 cm vertically.

Make sure the horizontal value is 0. Click COPY.

full drop 4

full drop 5

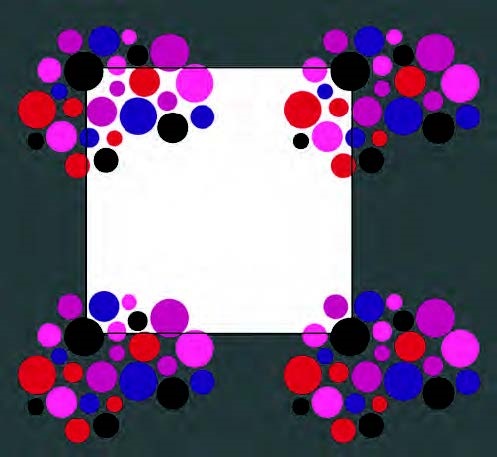
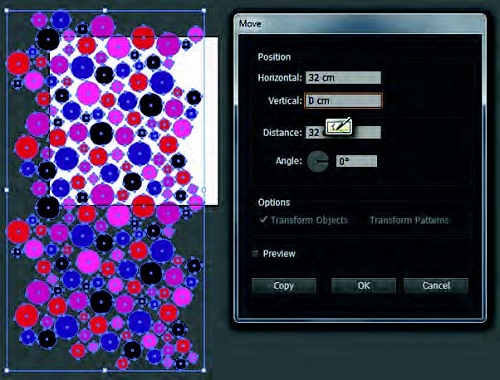
Now repeat horizontally by selecting both groups of objects along the left side. When in the move dialogue box make sure the horizontal value is the repeat size and the vertical value is 0. Click COPY.

full drop 6

full drop 7

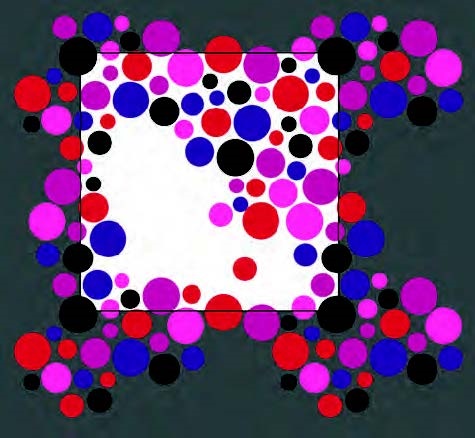
Now is the time to fill in the blank space in the middle with additional objects.

Tip: Lock the three extra sides of the repeat or put them on a separate locked layer so they can be easily deleted in a following step. This may require some more advance knowledge of illustrator, but don’t let this deter you if you are new, it could be helpful in mastering the program! The level of difficulty here will greatly depend on the style and type of original artwork you are using and will call into play several design elements and principles such as space, balance and unity. Watch out for anything that forms a definite line or track mark through your design. You may need to shift or adjust parts of your original artwork to make the repeat work, in which case is can be a good idea to work in layers (with a copy of the original locked) in case you want to jump back to the beginning.

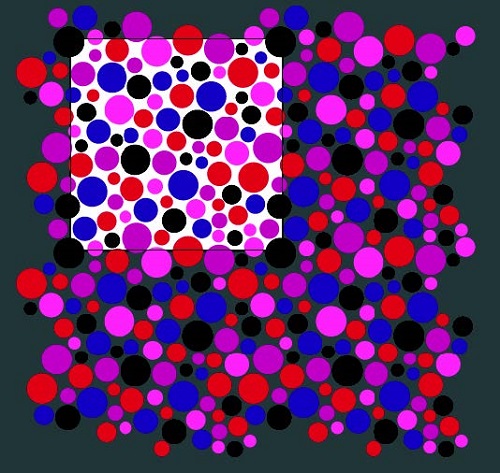
Work towards filling in the edges, duplicating them down/across to the repeat edges, till all you have is the middle to fill.

full drop 8

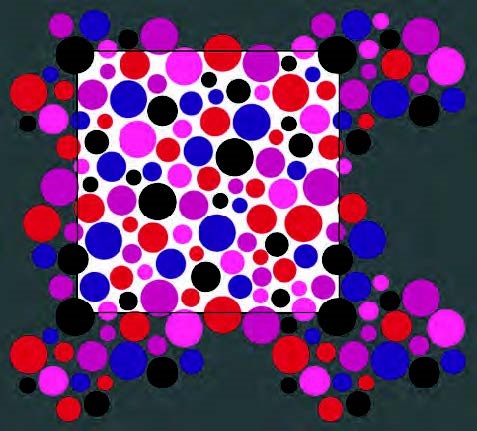
Continue until you are happy with the flow and feel of the design.

full drop 9

Now delete the three extra sides that were locked or moved to another layer. Then repeat the duplicating sequence with all the added areas/dots of the design. This will help you check anything that may have doubled up or just doesn’t look right in the repeat.

full drop 10

full drop 11

full drop 12

full drop 13

full drop 14

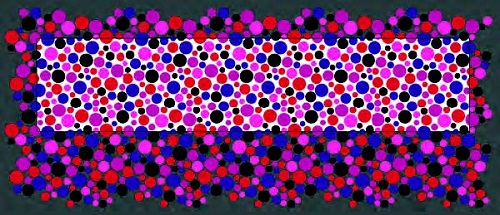
When you are satisfied with your repeat tile, you can set it up for digital fabric printing. Position two repeat tiles (vertically) so they hang over the left side of the art board. Increase the artwork WIDTH to the width of the fabric (in this case 147cm), keep the height of the art board as the repeat size.
full drop 15

Duplicate the selected objects across the width of the art board so it is covered completely. Tip: Once you have used the move tool to move the exact repeat size and clicked copy, ctrl D to duplicate the exact last action.

full drop 16

Save As a PDF. Even though there are objects hanging off the edge of the art board, because they have been moved the exact repeat size, they will all meet up when printed seamlessly. This is now your Full Width Repeat Tile which repeats top and bottom you can use it for digital custom fabric printing.

full drop 17

Save

Save

Save

Save

Save

Design Your Own Leggings Workshop – August 20 2016

design your own legging workshop digital fabrics
Imagine designing your own leggings, learning the process and receiving your custom made leggings with your own design?

Make this fashion dream come true & click HERE to participate in the Digital Fabrics Design Your Leggings workshop August 20th!

Get Leggings Inspiration with our Pinterest board

In this Design Your Own Leggings workshop you will transform into a fashion print designer where you will start from the beginning and develop your own leggings design with photographic print. You will be photographing floral inspired collage/layout and transferring your photography to a pair of leggings!After the workshop you will receive printed and made pair of leggings in your size with your own design!

Full day workshop style class will provide you with knowledge on digital textile design for placement printing of leggings.

Click here to participate and learn what we will teach you at the Digital Fabrics Design Your Own Leggings workshop.